Translate

Wednesday, July 27, 2016

TIM HOLTZ 2016 JULY TAG

Tim Holtz 2016 July Tag

I love Tim's July Tag!
Don't you???
It's Perfect for a travel theme!
If you would like to make Tim's Tag...just follow 
this link for all the directions you need to create it.
Tim ALWAYS AMAZES!!!!
This man is like an EVER READY BATTERY!
The ideas just keep on coming!
So Tim provided my inspiration, time to gather
my supplies to create my very own July Tag!
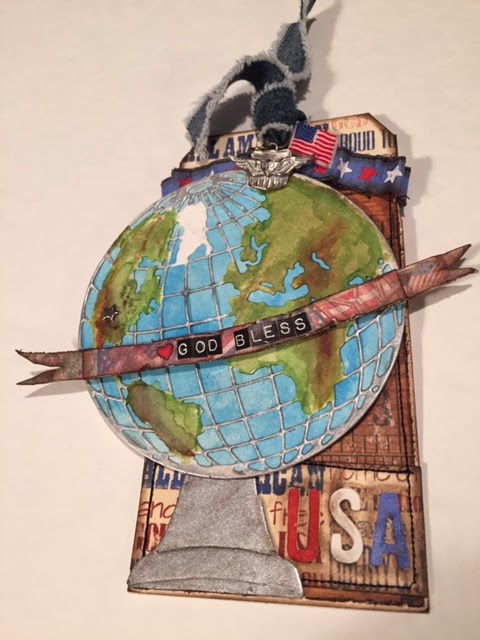
I having been wanting to use this die for a LONG time.
It was really a lot of fun to work with and once I 
began painting it....I couldn't wait to see the end results.

This die was deceiving in it's size, but as you can see,
it took center stage on the tag without any problem.
WOW...the details on this die are fantastic.

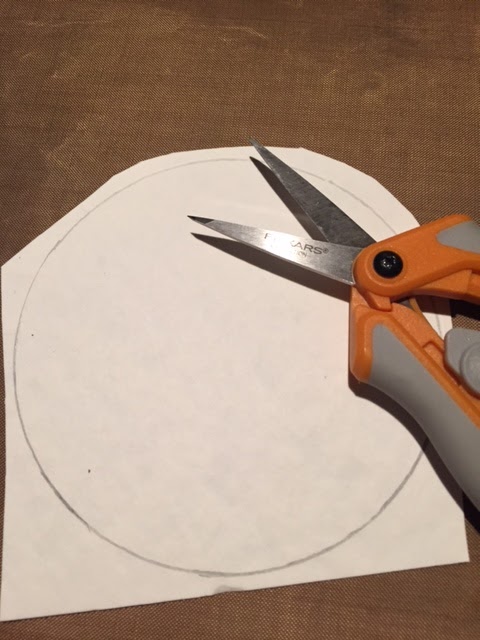
I used this circle as a base for the world die.  
Because this was such a large space,
I ended up switching to Broken China 
and Tumbled Glass Distress Inks along with
 Tim's Waterbrushes to color this circle,
for the ocean blue base. 
 I like using the distress ink pad for coloring larger areas and 
using the markers for smaller detailed coloring.
I found this photo of the world map on the internet.
Having a visual was helpful to me when I started
 coloring the world.
So now I attempted to pick a back ground paper.

I cut it, distressed it, inked it...and after all
that I thought the paper was just too dark....
I am thinking about changing it ....but I will
continue to work on my tag .....Mmmm
yep...I will have to change this paper.
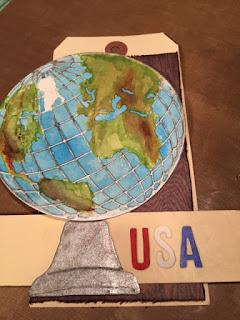
 I want the world globe to be on a stand...
I didn't want it floating in space.  So I used
the bell die and cut some chipboard.
Then used some Pewter Paint on top 
of it to give it some shine and inked the
edges with Expresso after it dried. I then cut
the loop off the top of the bell and then
cut off the curve of the base. I thought the globe could sit on this.
Next I placed the globe on top of this and 
realized I needed to make a slight bowl in the
top of the bell for the circle of the globe to sit on.
I just turned the bell over and traced the curve of 
the globe on the back and cut it with sissors.
The top outside edge points needed rounding too after making 
the bowl...a tiny little snip is all that was needed.
Time to make the word strip at the bottom.
Something simple:  USA
with RED, WHITE, and BLUE watercolored
underneath.

I like this...but that dark paper has got to go.....
I like this much better....
So I repeated the process with cutting, distressing,
and inking. 
 I am going to try something out of my 
comfort zone....I am going to try and stamp with
different colors on the stamp ...I hope this turns out
so I don't have to redo anything.  I put a little tape runner
glue on the cut out letters and set them back inside the letter.
This protected the watercolor letters since I had already 
glued the two parts together.  

I like to keep the insides of letters to glue on after 
cutting...like the triangle in the A and the circle in the O.
 I really "LOVE" how this turned out.
I don't normally ink with the distress inks, but
they were calling my name here.  I also stamped 
this same image at the top of the tag in the blank 
space there....Next....time to sew around the edges.
Almost done....A banner hand cut from Tim's Seasonal
Paper Stash Pad...(the Tattered Banner Die was too wide for 
the tag).  It got it edges distressed and inked too with Expresso.
I used Tim's Tiny Types (cut down in size) for
the words, GOD BLESS.
Then an inked heart cut from the Fiskars Heart Hand Punch found it's
home on the banner.
What next...it still looks unfinished to me.
A paper ribbon made out of the star die ....blue cardstock with 
red and white cardstock behind the blue...inked with 
Expresso and stitched.  This fit perfectly accordian folded at the top.
Then one of Tim's Star Fasteners on the USA continent, a flag pin at the top, some
military wings painted with Pewter Paint and hung on a couple of jump rings,
and some AMERICAN blue jean material for the ribbon and I am
 FINISHED!!!!!
2016 July Tag:  GOD BLESS USA!!!!
 
 
Happy July....
Thanks for stopping by and as always....
Feel Free to leave some "LOVE!"


Tuesday, June 14, 2016

TIM HOLTZ 2016 JUNE TAG

Tim Holtz 2016 June Tag

Here it is....Tim's FABULOUS FATHER'S DAY TAG
for June.
Follow this link to Tim's Blog for his tutorial on 
how to make his tag.
OK so I am looking at Tim's Tag and thinking...
what to make..?????..That is the QUESTION!!!!!
I put on my thinking cap and thought about what June means
to me!  Father's Day, Vacations, SUN, Heat, Cookouts,
Oh...... and my ANNIVERSARY!  For our 30th Anniversary,
my hubby bought me a Jeep!  We "love" our jeep! We get up early 
and go for a ride, "with the top off of course" ...no direction...just get
up, brush teeth, throw on clothes and go....It has given us sooo much fun!
Mmmm ...Maybe I could do something with this.
I didn't have a "Sizzix Jeep Die!"
(that's because there isn't one ...that I could find anyway)!
As a matter of fact...as I got to thinking...I really didn't have
much of anything to symbolize a Jeep. But...I was going to
try....so if I need help with a place to start, I always go to 
"images" on Google.  

I found a great image of a jeep and copied it
into a word document, sized it to fit on a tag
and printed it onto heavy cardstock....
Now I can begin!!!!!
At this point, I was thinking, I could cut out the tires,
 for the technique using the stencil. 
Trust me....It was not a good idea..So I decided to 
go ahead with getting the tag ready for a design and then
I would come back to this part later.
I only had regular tissue paper...but you never know 
if it will work unless you try it...So I used my Ranger
Archival Ink and stamped a map image several times
onto the tissue paper. Then I used this Amazing Distress 
Vintage Collage Medium onto the tag first..then put the
tissue onto it...scrunching it up....be careful...it can tear!
 I am in "LOVE" with this product.  I love the look..gently 
aged....it looks kind of like the coating on leather to me.
Next apply the medium on top, dry it with your heat tool
and cut off the extra tissue.
I was still trying to figure out the stencil design.
Doing the actual tires was NOT going to work...
I was thinking "TIRE TREAD!"
Then I looked at the tag and thought...Cut the TAG...
not the jeep...and that is the point where I was able 
to move forward.
So using this die I cut "tracks"
into my tag...This is where I thought I could 
stencil the track pattern underneath so it would
show through. 
 The pattern is just too large to
work for me.
What do I have that will look like tire tracks???
AHHHH.....Haaaaa....
WASHI TAPE!!!!!!
PERFECT!
As you can see my jeep fit right on those tracks.
I stamped a quote... found some gears and at this point
I was thinking how am I going to get my main idea ...
"ONLY IN A JEEP" on here???
I also stitched a center dotted line...
After  I did it..I thought that should have been "WHITE!"
....but the black will do!
Mmmmm back to the quote...
My girlfriend and I bounce ideas off of each other 
all the time when we SKYPE...and she brought up the license plate idea.
When I was getting out supplies and embellishments for 
this project...I got out my liscense plate die...but it was tooo
large for this project, so I kind of set that idea aside.
Maybe I can do something with that.
I thought I will just try to make a smaller one.
She suggested "ONLYINAJP"
on the plate....
but since I already had Jeep on the windshield (made
out of letters from Tim's Typeset die).
I put "ONLY....NA" what I needed on the plate!
What would I do without my girlfriend????? 

Here's my finished tag......

 
2016 June Tag
I found the compass charm on Etsy...Perfect!
I don't know about you.....but I am ready for
a "JEEP" ride!!!!!
Here are the rest of the supplies I used to create this tag:


Thanks for visiting ....and as always....
feel free to leave some "SCRAPPY LOVE!"


Wednesday, May 25, 2016

TIM HOLTZ 2016 MAY TAG

Tim Holtz 2016 May Tag
It's TAG TIME
 Tim's Tag is soooo BEAUTIFUL. 
Here is the link to Tim's tag and the directions on how 
to create it:
However... I didn't have this stamp or the spoon or the
 TinyTattered Florals die.  I have lots of 
stamps, but I am not into buying images of people.
So I knew I would really have to think about what I was
going to do with this month's tag. I didn't really want to
do another photo tag of my mom...I already have several 
of those....MMMMMMmmmmm what to dooo????
Going through my stamps really helped me here.
I found this one stamp that I had purchased  that
had this beautiful child's face on it.  Yep...it's what I am going with.
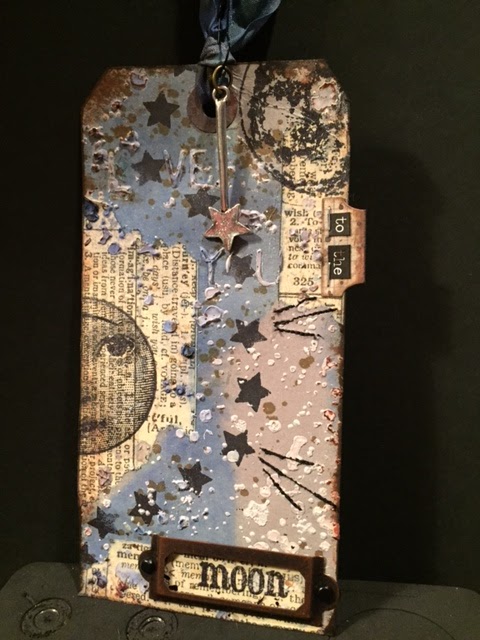
Here is my Month of May Tag.
You are right ....this tag has NOTHING to do with
the month of May... I just went with the 
creative spirit.
See the beautiful child's face on the stamp....
When I was making this tag...I had no idea what the name 
of this stamp was.  I thought....this is so sweet and the face is so round
like the moon....I thought...."Love you to the moon and back"....
I looked at it and it made me think of another
stamp set I had which I will share with you further into this post.
I really had to stop thinking about Tim's pretty tag so I could
focus on creating something totally different.
So following Tim's directions I applied my washi tape.
Here's the To The Moon stamp set.  I purchased this awhile back
from Simon Says Stamp. I partially stamped the images onto
Now to apply the modeling paste.  
It doesn't take much.
Here is a close up of how well
the modeling paste went through 
the SPECKELS stencil.

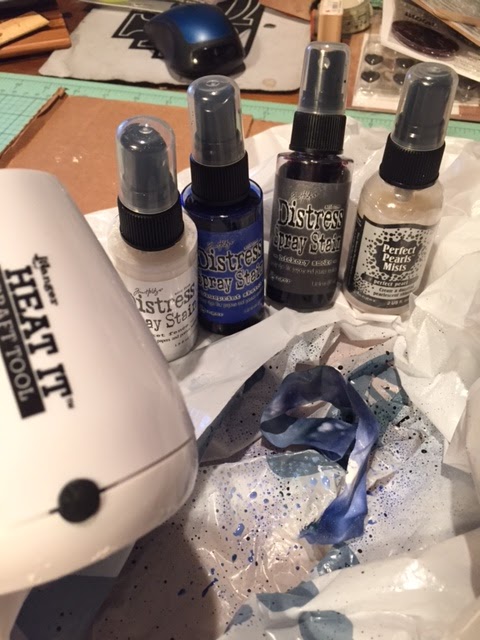
The distress ink colors were an easy choice.
Sticking to blue, pumice stone and
some white!
Today I was being really lazy.  I just took a large bag and
set my tag in there to spray... I may do this again.  I had 
enough ink left in the bag to put my ribbon in there and get it all inky.
I do not like to waste my colors. LOL!

 Ohhhhhh....it's looking soooo Pretty!

 Here are the colors I used.
 Let's dry this baby....
  Does this have the look of the moon surface...
I have never been there but I have heard of a 
"BLUE" moon.
 Lots of little ink drops still in this bag.
Just enough for my Tim Holtz Crinkle Ribbon.

Time for the final embellishments.
A little charm to dangle from the ribbon.
A label for the word moon.
Some distress ink for the edges and
a few stitches on the sewing machine to look
like shooting stars.
A tiny tab for Tim's Tiny Types "to the"
(black and white).
I cut the tab out of paper scraps.
(I was tooo lazy to even get out my mat...
I just used some old chipboard)
Time for a little more ink spray.
I just unscrewed the top and shook the straw
part of the sprayer over the tag.
I really like the way this "DROPS" onto
the tag.
I blotted the excess off of the washi tape.
Ta Da.....ALLL DONE.
Can you still read it????

LOVE YOU to the MOON!


I was trying to get the pretty shimmer in this photo.

Here's my "MOON" Tag for the month
of May.
Hope you liked it!
Thanks for stopping by and leave some
"LOVE" if you want!