Translate

Friday, August 5, 2016

TIM HOLTZ CREATIVE CHEMISTRY 103

WAITING ON YUPO

I am soooo excited to try this new
product.  It's called YUPO.
Tim says it's synthetic...a plastic...
and I will tell you after watching his video
in Creative Chemistry 103, that this 
product will WOW you when you
use the alcohol inks with it!
I am sitting on pins and needles waiting for
my YUPO product to arrive.

Anyway, I decided that I would just 
create one tag for Day 5 with Glossy Paper
and then repeat it again on Yupo when it arrives.

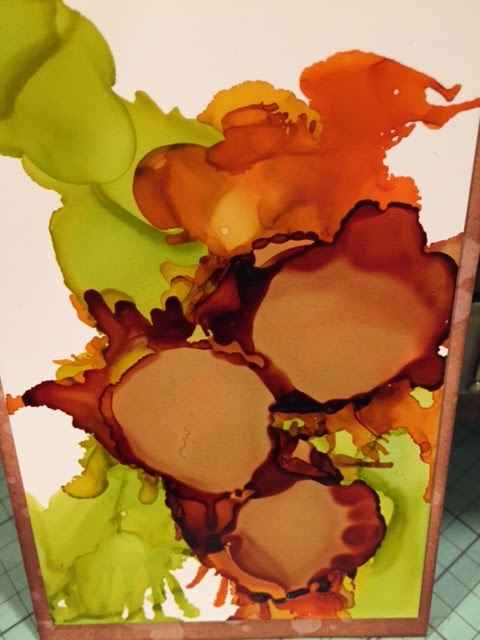
Alcohol Ink Stamped on Glossy Paper
Check out this background....
GORGEOUS.....
soooo sad my stamp slipped and this is all you 
are going to see of this BEAUTIFUL background.

This is pretty, but if I had just added some 
more BLUE...I would have had similar results.
Tag #1 - Alcohol Ink Stamped Resist on Yupo


This technique is really fun.....as I think all 
the lessons with alcohol ink will be.
So you apply alcohol inks and the Blending Solution onto
your applicator tool, and dab it all over your Yupo.
Keep applying until you like your background.
Let this dry.
Stamp your image with Archival ink......
be ready with your towel to wipe off the ink.
And TA DA...like magic there is kind of this
ghost image left.   FABULOUS FUN!

My Yupo product has arrived!
Tag #2 _Alcohol Ink Faded Layers on Yupo


This technique is a lot of fun and reminds me of the techniques used in 
Art Journaling.
Begin adding your layers of color of alcohol inks.
.(Let these layers dry). 
Put some blending solution onto your mat and 
gently work the solution onto your round blending tool foam....
(Making sure you apply just enough to wet the foam).
Next take a stencil and lay it on your project where you 
want the design.
Take your round blending tool with blending
solution applied to it and gently remove the color.
I really like this technique.
  
Tag #3 - Texture Resist on Yupo


Using alcohol inks make your background. 
Next pick an embossing folder to emboss with.
In order for this technique to work, this next step is important.
When embossing make sure the image is going to be pushed up through
the paper...(you want to be able to feel the raised image on the colored side of the paper).
Ink the raised surface with Archival ink and then immediately wipe away the ink
with a dry cloth.  You can work in small areas of the embossed image at a time.
As you can see from the tag, the embossed image appears after you wipe 
away the ink.....LoVe this technique!

Tag #4 Alcohol Ink Painting
You can make a very pale background and stamp your
image using a light color of Archival ink before you begin painting.
I went online and found an image to guide me and 
just painted it without stamping.
Pink Daisy
Here is my Alcohol Ink Painting on YUPO.


I found painting with Alcohol inks fun. Once you figure out how they work 
(they dry fast...but you just rewet the ink with blending solution), I think the inks
make them another great product to paint with.

Tag #5 - Alcohol Ink Liquid Landscape on Yupo
I found this technique interesting...but I was very hesitant and leery
of this entire process.  But once you go with it and just allow yourself
to play and not worry so much about the outcome...I found I
liked my end result.  You just move the alcohol inks around
 (you can use a straw or popsicle stick or some smooth tool on 
the surface) and try to achieve a landscape design.  
Pretty cool.....and I fell in Love with it after I stamped
the pine trees on it. 


Tag #6 - Alcohol Ink Splattered Florals on Yupo 
This was another technique that 
I was hesitant about trying. 
I just didn't see the purpose.
So I decided.... well this is suppose to be FUN!
And that is what I tried to do ...HAVE FUN!!!!
Apply Alcohol inks directly to Yupo.
 Apply blending solution, and then blast the ink 
with air using a straw or canned air.
I just used the Distress Marker Spritzer for 
this technique....I didn't have a can of air
or a straw on hand.


This is the final lesson from 
Creative Chemistry 103.
I have learned a great deal and
had a lot of fun using products and techniques
that I haven't used before.
Thank you Tim Holtz, 
and
for a FABULOUS CLASS!!!!!


Thursday, August 4, 2016

CREATIVE CHEMISTRY DAY 4

THCC Day 4:  Distress Crayons

Here they are...and guess what...
MORE are coming!
I can't wait ...there are more shades and pastels,
LOTS more!!!!!
If you have not tried these crayons...
Well....you just oughta...
They are FABULOUS...
Kind of like gelatos, but better.  The most 
important thing about these crayons is that they
won"t  react with water unless you want 
them to, all you have to do is touch it.
Get ready to get your fingers dirty!
Tag #1 Distress Crayon Smudge
Get your fingers dirty...Smudge those colors....
all over a layer of Texture Paste.
 This was sooo much fun...
Yep I put only warm colors on here...
guess I need to make one with the
cool colors....YUMMY!

Tag #2 Distress Crayon Gesso Fresco
1st step - apply gesso, 2nd step - more smudging!
3rd step - use stencil and gently rub with damp
paper towel to lift color.
These crayons are so much FUN!!!!

Tag #3 Distress Crayon Textured Resist
The crayons were used like a modeling paste for this tag.
It's just a really thin layer used on the stencil and you go
over it with you finger and continue to smudge inside the stencil.
I really enjoyed this.  
 As I began inking this tag and the design appeared,
I was like Ahhhh, the pink is soooo soft and pretty,  just 
what I wanted to see. This is Tim's "Scribble" stencil.

Tag #4 Watercolor Resist


Tag #5 Distress Crayon Blended Background

Ohhh La La....I am in LoVe with these
crayons....smooth like butter and see how the
colors LoVe each other....Just by blending with 
water ...watercoloring with crayons...XOXO

Tag #6 Distress Crayon Layered Coloring 


First stamp your image, then apply your
collage medium...I used "CRAZING,"
(Two coats, first with a brush and another....
I used my finger -as suggested by the
Master himself- Tim Holtz.)
let dry, apply color with Distress Crayons,
smooth/blend colors, (I used my fingers), 
you can also use your water brush! 
Next dry the colors (this sets them), 
then use Picket Fence Distress Crayon
 to hi-light certain edges of your stamped images.
is just Fabulous here....see all those 
teeny, tiny cracks.  LoVe them!
Thank you for taking the time to stop by!
Leave some Scrappy Love if you'd like!


Wednesday, August 3, 2016

TIM HOLTZ CREATIVE CHEMISTRY 103

THCC Day 3:  Distress Collage Mediums and Texture Pastes

I have always loved creating collages
AND 
Looking at old photos.
I sat with my grandmother and my father
looking at photos and watching them place 
photos in albums.  As they worked they would 
talk to me about all the details of the photos:  who was 
in the photo, whose side of the family they were on, and how they
were related.  
I had purchased the Vintage Distress Collage Medium some
time ago and fell in love with the appearance it 
gave my projects.  It brings back the memories
I have of looking at family photos of people long ago.
My father would really love this medium if he were here.
Tag #1 Distress Layered Collage


The Distress Vintage Collage Medium along with the
Distress Crayons worked  "PERFECTLY" for
aging this project.  
Tag #2 Texture Paste Coloring
 Tag #3 Texture Paste Embossing
I didn't have the proper paste for this project so
I gave it a go with something else that I love to use...
This stuff is sooo much fun...
so here is my tag with a different product.
Tim is always saying...practice...try new things
...you might discover something fabulous.

This could be a beautiful piece of fabric....
I am always in AWE when I use this stencil.
THS032 Flourish
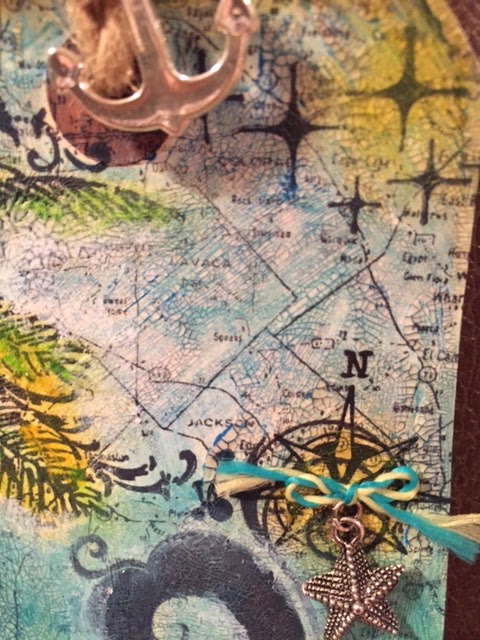
Tag # 4 Texture Paste Resist
These tiles on this tag were made by using 
Tim's Tiles Layering Stencil # THS042
and the Transparent GlossyTexture Paste...
Tim used Picket Fence Ink on his tag to
highlight the tiles.  Mine is ordered so 
I just used some Distress Walnut Stain Ink on mine.
I love how this turned out.
Tag #5 Distress Grit-Paste Grunge
I really liked this product.
I don't mind getting my hands dirty at all,
so I applied it with my fingers just like
Tim suggested.
Then I applied the distress crayon.
It's really best to smudge the color in
with your fingers.  The color just blends and
smooths out and softens.
(If your finger gets sore...you can switch fingers
or use a rag).
The Grit-Paste looks like tree bark to me here.
My father love the Smoky Mtns. which is where
this photo was taken.
For me....I would say this is a keeper!!!!
Thank you for taking the time to stop by .......
leave some crafty love if you'd like!
Mylissa