Translate

Wednesday, June 26, 2013

Famiy Time Mini Album

I have so many projects that I have been wanting to share.
 Sometimes life just gets in the way of things.  But I believe
that no matter how bad things can get in my life...there's
someone out there struggling worse than me.  Scrapbooking
really gives me an outlet.  I can go in my "woman cave" and
forget about all my problems.  So let me share this fun family
mini book with you.


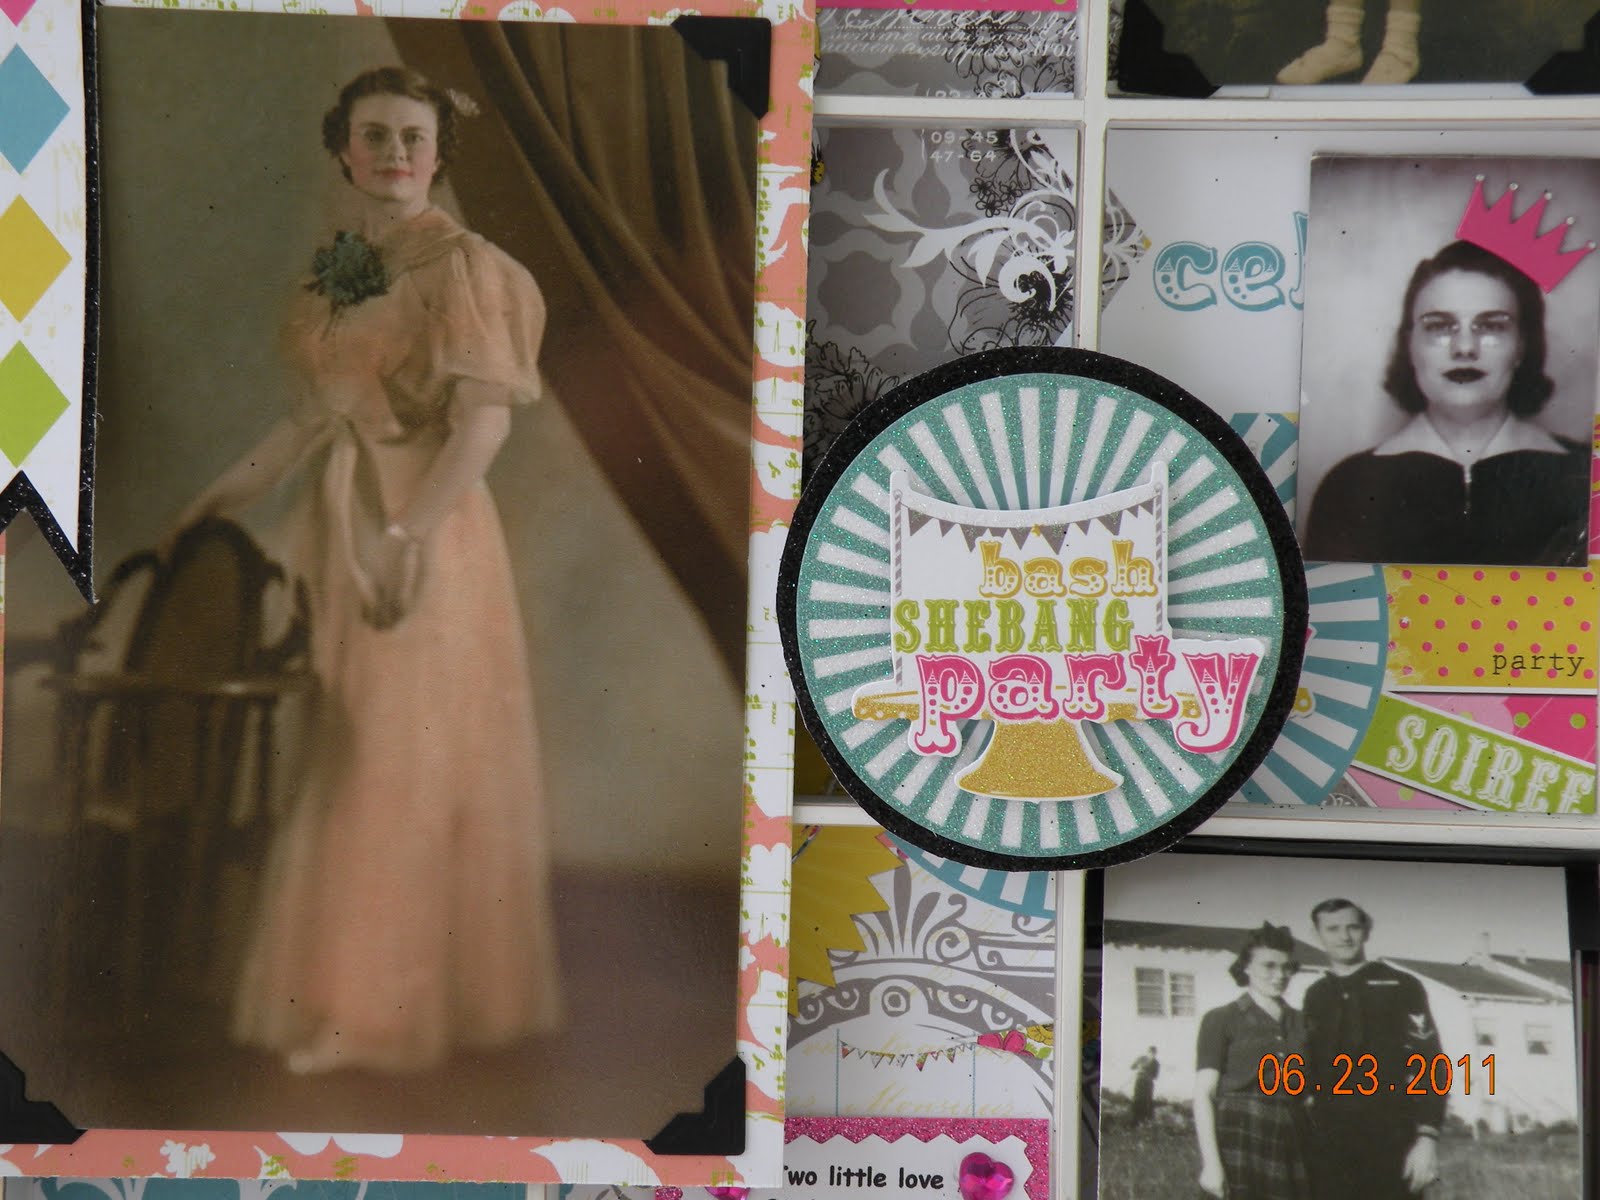
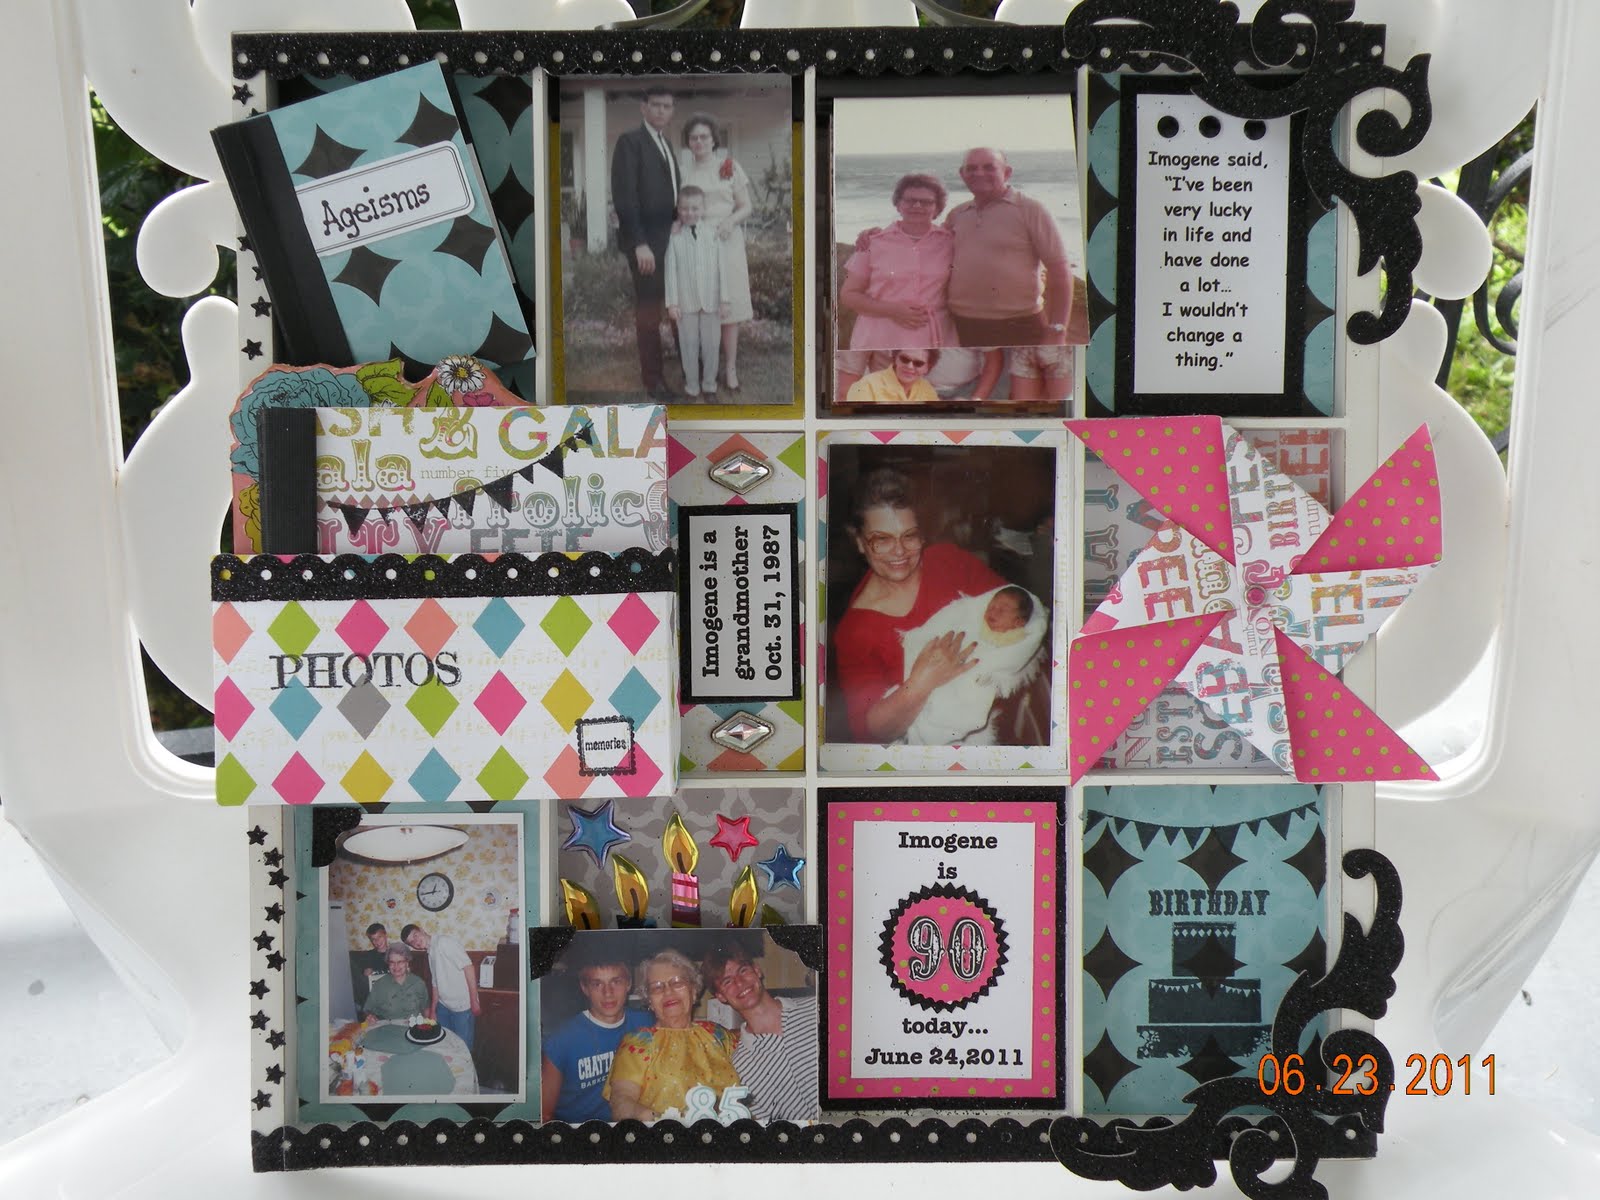
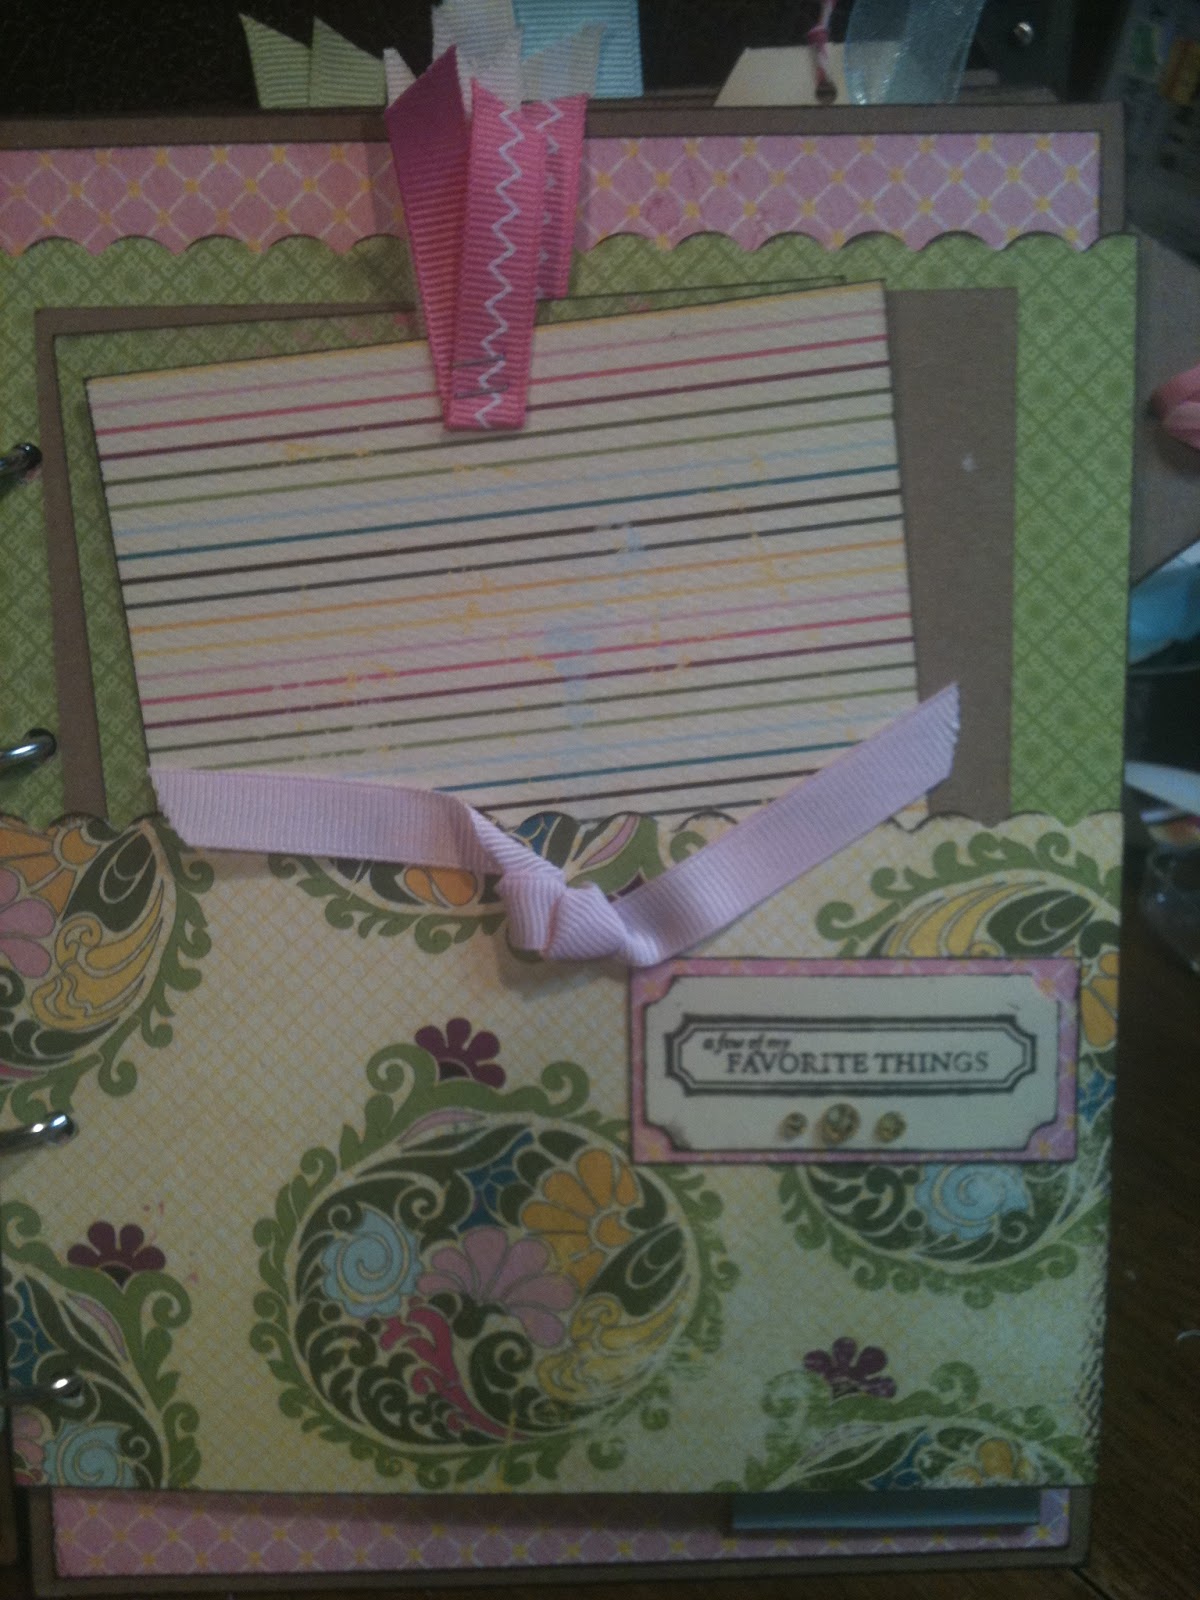
This mini book was made out of Authentique's Splendid
Collection.  I saw this paper at Archivers and knew I
had to have some of it.  I fell in love with the colors and
patterns of this paper line.  I had also purchased some new
family stamps and it just seemed like making a family book
was calling my name.  This book is mainly paper with some
stamped images.  It took me awhile to come up with the complete
cover, but once I realized I needed my heart on it...well it just
worked out perfect.  I hand cut the heart and layered some chipboard
behind it along with Tim Holtz's vintage lace die.  The other die I used
is Sizzix #657080 Bird Set #2.  I love the little berries and just took
some Glossy Accents to it and the little star.  The bingo card is a stamp too.
If you don't have a stamp, you can probably use an actual bingo card...they are
still popular. You could check on Jenny Bowlin's website...she probably
carries bingo cards or you can use an actual bingo game card.  That would be
fun.  I hope you enjoyed checking out this family mini book.  Just shoot me a message
if you have any questions.


Thursday, March 21, 2013

Tim Holtz Tattered Flower Challenge

I'm so excited! I finished my first challenge EVER! Here it is... a tag to share.
when I first read what Tim had to say about why he wanted to do a challenge with his "tattered flowers" die, I started thinking about where I would like to go when warmer weather finally arrived to stay. ... the beach of course! So I made a tag that made me think of the beach! I may not win anything, but I had so much fun making this tag tonight. it has been in my head ever since I read about the challenge and tonight is the first chance I've had to make it. Fun, fun, fun .... ready for the next assignment!

 
To make this tag I used a heavy art canvas and inked it with
Tim Holtz's Tumbled Glass Distress Inks.  I really wanted a marble effect up at the
top of the tag so I used a light pressure in spots.
Next I used a stamp at the bottom that looks a little like sand with Tim's
Brusehd Corduroy ink.... I kept applying it a little heavy ont the left side
until I liked the look. I also used some Antique Linen to ink the edges of the tag.
To make the beach sign, I used kraft paper and a Paper Studio embossing folder
with the wood design in my Vagabond. Then I inked it withsome Vintage Photo
and Brushed Corduroy.  I love anything with nature paper...and visual effects.
Tim also has a wood embossing plate.  I think the sign turned out great. I used two brads
on the sign after I took a file a scuffed them up a bit to take the shine off.  I made the words
with white paper using Tim's Typeset Die....these are some of my favorite letters.
Next I inked the letters with Antique Linen.  The letters look like they belong there.
Now I just needed a touch of grass along the base of the sign...I wanted it to look like
it had been there awhile.  I just took some chipboard and hand cut the grass.
When I glued it on, I only adhered it at the base of the grass.  Then used some Tim Holtz
Peeled Paint ink to give the grass some life.
Now I need something for the flowers to grow on....Let's see. The Tim Holtz Alterations
 Die...Elegant Flourishes will be perfect.  I cut this out of chipboard also and added some
burshed Corduroy and Vintage Photo ink. Not enough to cover the entire flourish, just along
the edges and places along the top.  I glued it along the left side of the tag around
the sign. I really wanted it to look as if it loved where it grew.
NOW...for the most important part....the TATTERED FLOWERS.
I didn't have a lot of time left to work, so I picked some light pink, darker pink and a soft
 yellow cardstock to work with.  I put the paper on the die and ran it through my Vagabond.
Then I took some Worn Lipstick and RustyHinge and inked the edge of all my flowers.
I then layered them and put them together with a small brad using the yellow in the center.
I then worked with the flowers a bit, bending and curving the edges under. When I glued them
on I think they look like they belonged there.
The flowers just popped off the tag with the blue in the background.
I also took a speck of yellow paper and inked it and glued it at the bottom of the tag...kind
of like a petal had fallen and was slowly wilting. 
I had some fishing net that I put through the tags hole at the top.  No time to add any quotes or stamps.
I think the simplicity of this tag will have to do considering I don't have any more time to work on it.
Soooo...TA DA....I'm finished for now....
Luv it..and hope you do to! 
Quick and easy!


Sunday, January 6, 2013

Hello Christmas Tag

Hello 2013 and to all you scrapbookers out there.  I am happy to say I am back and I am looking
forward to writing to my scrappin friends and sharing my passion.   I finally got a new computer,
which has all the updates that I needed in order to upload pictures...FINALLY!  Hooray!  Don't
you just love it when things work out and go right.  I need some of that!
I have worked on so many new mini books this past year and  I look forward to sharing some
of those projects. Right now I just want to reconnect.  What better way to do that than share
something I am passionate about.  My first project of the holiday season...A tag....cause well,
I love everything about Tim Holtz!  I love other designers too, but Tim is  a "Master"
of techinique.  I learn so much from him. 
  I made just 1 tag, but I love it ...it speaks to me...because I am all about creating
from my heart. 
 
 
 I used Making Memories "Believe" plus Teresa Collins (my other favorite designer)(so
totally different from Tim) "Christmas Cottage Countdown" paper for this tag
sized 7" x 3 1/2".  Christmas Cottage went behind the heart and around the hole at the top. 
For the banner and small tag, I used some Bo Bunny Double Dot "Chiffon Journal." I hand
wrote the words, but it would look good with typed font or some tiny types too!
All Dies used were Tim's:  Alterations Tattered Banners, Festive Greenery and Love.  I used
scrap paper for the greenery and flourish.  Why waste a new sheet of paper when you can use
scraps.  Now when I made the heart I cut it at 4"with my Slice using the Wedding Cartridge.
Next I used some Tim's grunge paper (I LOVE this stuff - thick like chipboard but
pliable) and inked it with Tim's fired brick.  The darker red hue turned out NICE! 
For the little gems, I thought it really needed some dark red to go with the heart.  In my
stash I found some by Little Yellow Bicycle....PERFECT! To complete the tag, I added
dark evergreen ribbon!  Just what I envisioned!
A simple tag, without difficult techniques, just some cutting, inking, and gluing, especailly
when you don't have a lot of time. 


Saturday, July 14, 2012

CHA bound again!

Well hello there to all my friends. My apologies for not
writing to you for such a long time. My sweet daddy
 passed away in January. I'm so thankful for the time
we had together before he passed away! I really can't
share much about this right now because it is still so
 painful.  The circle of life can definitely be hard!

My computer is being such a pain too!
 That is the main reason that I haven't been blogging.
So I'm going to try to get around that and starting
posting again. I have really missed this!
 I am off to CHA in Chicago this summer!
 Another exciting adventure!I shall give you an update
soon and hopefully post all the projects I've been
 working on! TTYL!

Monday, October 31, 2011

It's Been Way to Long

I can't believe it has been at least 3 months since I have posted on "my scrappin road!"
I have so much to share, but it's really late, so I'll just write what I can for now.
Since the trip to CHA, I have been putting in a lot of hours at EMI and for awhile,
that is all I did...help at the store.  I will talk about CHA later...that's really old news,
but a great experience for me since that was my first visit.  Anyway..since my last
posting I finished my first mini book kit for EMI.  The link  is on my blog.  I am so
very proud of it.  The title is "Captured Moments."  It is for sale at EMI Scrapbook
Store.  I used Gabrielle paper by Bo Bunny.  So if you are able to check it out, do ...
 and then leave me a comment and tell me what you think.  I would appreciate any advice,
because I really want to improve my work. 
I hope everyone had a safe and Happy Halloween!
Mylissa

Saturday, July 16, 2011

CHA Here I Come

I am sooooo excited!  I am going to CHA!  Wow!   I can't wait!  A dream come true...I will tell you!
I am one lucky woman.  My husband put gas in my car, gave me some $, and said, "Have a good time
honey!"  "You need to go, you deserve to go! I want you to have a good time!"  When I return for CHA
I will give you a much needed update.  I also am planning to try to load more pictures and write more each week.  I have so much I want to share with you.  Thanks for your patience.  I  have been so busy helping out at EMI Scrapbook Store, that I just haven't had the energy to post like I wanted to.

I am really trying to get healthy.  I have been walking with Susan, the owner of EMI Scrapbooking
Store in Cumming, Georgia.  We have been walking 2 to 3 miles 5 to 6 days a week.  I am really
blessed.  Since 2007, I have prayed for a walking partner.  Someone that wants to walk in the
mornings with me.  Again, I tell you I am blessed.   God sent Susan into my life.  We support each other
with our walking, with our daily diet, and with a positive attitude.  This is the change I needed.
I know that I have to walk and watch what I eat for the rest of my life.  However, it is so much
easier to do with a friend. 

Take care and have a Blessed Day!
Mylissa

Sunday, June 26, 2011

Mother-in-laws 90th Birthday 7 Gypsies Trays

The 90th Birthday Party event has come and gone.
Everything turned out perfect.  We had simple party
for my husband's mother at a small Chinese restaurant.
The birthday girl socialized, ate good food, blew out
90 candles, and ate some birthday cake.  We all raised
a glass of champagne in her honor. 
I made two 7 gypsie trays for her which had pictures from
her entire life.  It was very difficult trying to put so many
pictures on those small trays, but I was very pleased with
the results and so was my mother-in-law and that was the
important part.  I wanted her to be able to see pictures of
her life as she went about her day, without having to open
a book.  We hung the trays on the wall in her den by her chair.
This is the first tray.


If you lifted the picture up on the right, you would find
another picture under it.  I used the accordian fold at
the top of the pictures and hot glued it to the top of the
square section that I placed the pictures in.  It was like
a flip book.  I repeated this process in several places.


I think my favorite part is the little picture of Imogene
with the crown.


Here is the second tray.


I used Pink Paislee House of 3 Soiree Paper, supplies, and
 embellishments.
Other products I used:
Black card stock
Colorbok black glitter paper
Teresa Collins Posh glitter paper
Echo Park Be Mine alpha stickers
Making Memories mini shimmer black alphas
Making Memories Metal flowers
Studio g stamps
Paper Studio Spare Parts crown brad
Paper Studio Spare Parts adhesive gemstones
Recollections brads
Best occasions metal dots
EK success birthday candle stickers
Hobby Lobby Charm Me Bride/Groom Charms
Punches
Sizzix Flourish die cut
Light Blue embroidery thread

I hope you enjoy looking at these two projects.
In the beginning I really worried about how I
was going to get all these pictures on the small
trays.  But once I started working on them and
had some uninterrupted time, I was able to
realize I could use the accordion fold to my
advantage in this project.  It really worked for me.